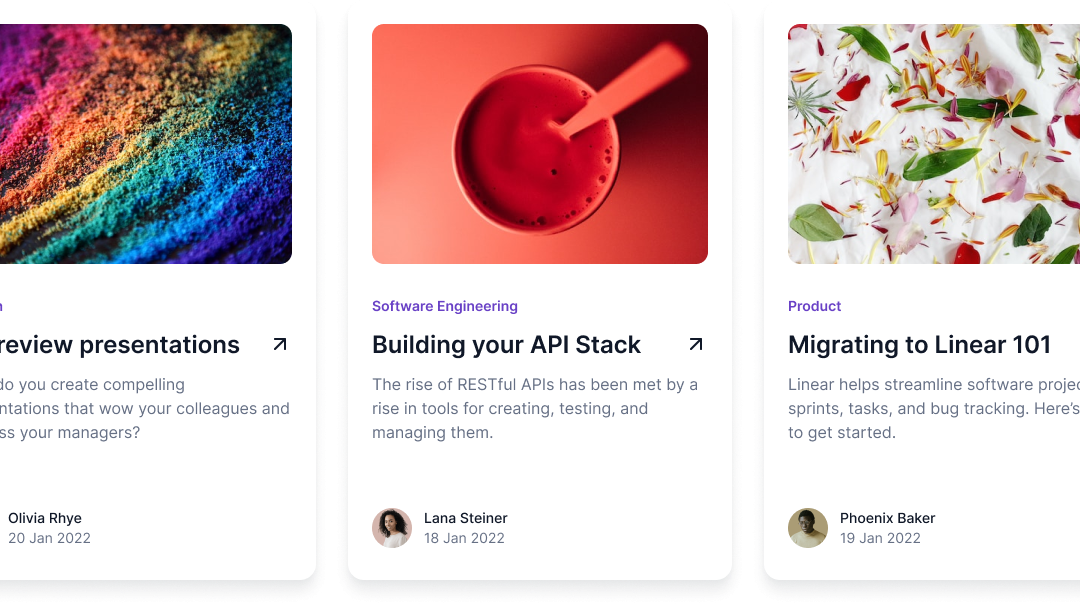
Most WordPress websites depend on posts to keep them interesting. Displaying these posts attractively is important, and you can achieve this by using a slider or a carousel. Thankfully, the Post Slider and Carousel plugin provides both of these options.
You don’t have to limit these features to just your homepage; you can put them anywhere. Plus, you can change them a lot to match your website’s style. This plugin can make your website better, and today, I’ll show you what it can do on Divi website
Important Features –
- Have complete control over how the carousel looks and works.
- Sort your posts by title or date.
- Adjust the size and position of featured images.
- Decide how many items should appear on each page.
- Set the number of columns for both regular and mobile screens.
- Choose to show or hide post details like the author, date, comments, summary, or read more links.
- Customize the colors and fonts for every part of your blog.
- Fine-tune the spacing for your post item.”
Difference Between a Post Slider and a Carousel?
Even though sliders and carousels are similar and used in similar ways, they have some important differences.
A slider displays different pictures at a time. When you move the slider or after a certain time, the picture changes.
A carousel shows multiple pictures at the same time, and they move as the carousel goes around. You can start the picture rotation yourself or set it to rotate automatically after a certain time.
But they aren’t exactly the same.
The main difference is how many pictures they can show at a time. A carousel can show many items, while a slider only shows at a time.
Creating a New Page or Post
To do adding a post carousel to your Divi website, you’ll need to create a new post:
You can create new posts with Divi Builder or its classic editor. Must set the thumbnail images. These thumbnail images will show in the post-carousel slider.
Giving Your Post a Relevant Title Now that you’re in the post editor, it’s essential to provide a descriptive and relevant title for your content. Here’s how:
Once you’ve given your page or post a title, you can proceed to add the post carousel using the Divi Builder.
Adding a Post Carousel to Your Page or Post
Adding a New Section to Your Page through Divi Builder, you have to create a section where you can place your post carousel.
Inserting a New Module Once you’ve added a section, you need to insert a module to display your post carousel.
Selecting the Post Carousel Module After finding the “Post Carousel” module, you have to select it to add it to your section.
Configuring the Module Settings Now that you’ve added the Post Carousel module, you need to customize its settings to display your desired content. Here are the key configuration steps:
- Selecting Categories or Tags
- Find the option for selecting “Categories” or “Tags” in the module settings.
- Click on this option to choose specific categories or tags that you want to include in the carousel. You can also leave it blank to display content from all categories or tags.
- Customizing the Carousel Display Settings (Autoplay, Navigation, etc.)
- Explore the module settings panel for various display options.
- Customize settings such as autoplay (if you want the carousel to automatically advance), navigation arrows, slide animation, and more, to match your preferences and design.
By following these steps, you’ll configure the Post Carousel module to display the content you want in the way you desire within your Divi page or post.
Styling Your Post Carousel
Accessing the Module’s Design Settings To make your post carousel visually appealing and harmonize with your website’s design, you’ll need to access the module’s design settings.
Customizing the Layout, Colors, and Typography to Match Your Website’s Design Once you’re in the design settings, you can tailor the appearance of your post carousel. Here are detailed steps for customization:
- Layout Customization:
- Look for layout-related options such as “Number of Columns,” “Image Aspect Ratio,” and “Spacing” between carousel items.
- Adjust the number of columns to control how many items are displayed in each row.
- Modify the image aspect ratio to ensure images are displayed in the desired proportions.
- Fine-tune spacing to control the distance between carousel items.
- Color Customization:
- Find options related to colors. These may include settings for text color, background color, button colors, and more.
- Customize these colors to match your website’s color scheme. Click on color pickers to select the exact shades you want.
- Typography Customization:
- Explore typography settings to adjust text font, size, and style.
- Modify fonts for titles, excerpts, and any other textual elements within the carousel.
- Ensure that the chosen typography aligns with your website’s overall typography choices.
- Additional Styling Options:
- Depending on the Post Carousel module and the Divi theme you’re using, you may find additional styling options like border settings, shadow effects, and more.
- Use these options to add extra visual flair to your post carousel if desired.
Tips for Enhancing Your Post Carousel
A. Using High-Quality Featured Images
- Opt for high-resolution and visually appealing images for your carousel posts.
- Clear, sharp images enhance the overall look and professionalism of your carousel.
B. Writing Engaging Post Excerpts
- Craft concise and compelling post excerpts that pique the reader’s interest.
- Engaging excerpts can encourage users to click and explore your content further.
C. Promoting Your Most Important Content
- Strategically feature your most important or popular posts in the carousel.
- Highlighting key content can drive more attention and engagement.
Conclusion
In summary, creating a post carousel in Divi can elevate your website’s visual appeal. By following the steps and applying the provided tips, you can effectively showcase your content.

